
Key Takeaways
- There are 7 different pool bridges, such as open bridges, closed bridges, rail bridges, and so on. Let’s see how to form bridges and how each can create a unique shot now!
- Choosing the right hand bridge depends on three main factors: level, shot requirements, and personal comfort and style. Follow the guide for more information.

Find out different pool bridges in playing pool
Open Bridge
Open bridge in pool games is a common hand stance when shooting pool. To form the Open Bridge, press your thumb against the side of your pointer finger. Follow these steps:
- Form the V Shape:
- Press your thumb against your pointer finger to create a V shape.
- The cue stick will rest in this V shape.
- Create the Groove:
Let the cue stick rest in the groove between your thumb and hand.
- Stabilize with Fingers:
- Spread your fingers out on the table to form a tripod-like support. It makes your bridge more stable.
- Keep your pointer and middle fingers close together.
- Adjust the Height:
You can bend or flatten your knuckles to change the height of your bridge. It helps you hit the cue ball at different points.
Players prefer the open bridge when shooting off the rail, over balls, or reaching for balls. This technique offers an unbroken line of sight down the shaft, which improves aiming.
Pros | Cons |
|
|
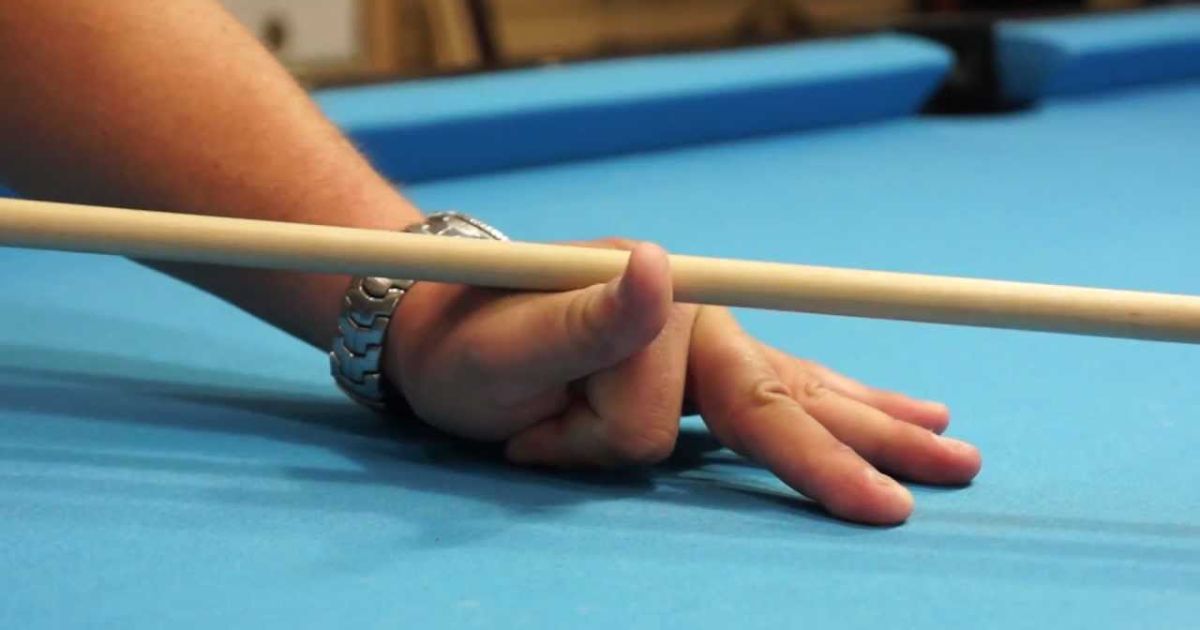
Create V shape in open pool bridge
Closed Bridge
A closed bridge is the opposite form of hand stance compared to an open bridge. Create it by forming a ring with your pointer finger and thumb. Learn some steps to make a closed bridge pool below:
- Form a Ring: Make a ring by touching your pointer finger to your thumb.
- Position Your Fingers: Press the spot where your finger and thumb meet against the side of your middle finger.
- Hold the Cue: Use the ring above your middle finger to hold the cue stick.
- Stabilize Your Hand: Spread your pinky and ring finger on the table to create a stable tripod.
- Add Extra Stability: Twist your hand slightly into the cue. It adds more contact points between the cue and your thumb, index finger, and hand, similar to the groove used in the open bridge.
The closed bridge is excellent for players who want to add top or side spin to their shots. Wrapping your index finger around the cue stick can reduce vibrations and prevent the cue tip from deflecting off the cue ball, improving accuracy.
| Pros | Cons |
|
|
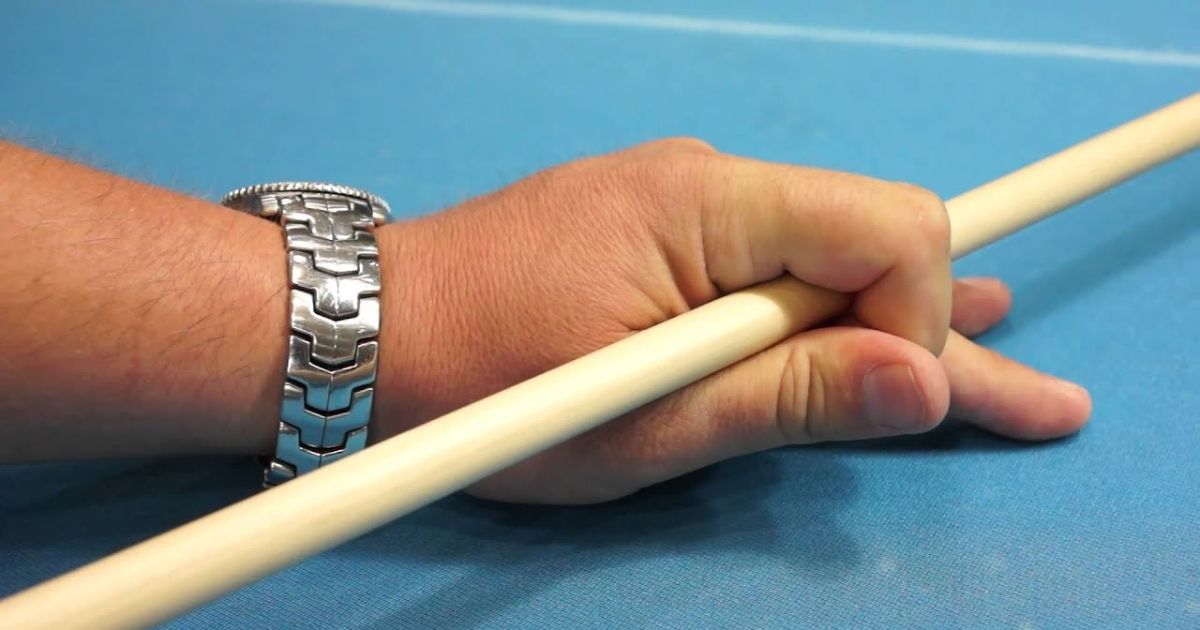
From a ring by touching your pointer finger to your thumb in closed pool bridge
Rail Bridge
When the cue ball is very close to the rail, it is hard to make a regular bridge. You can use a rail bridge by using the edge of the pool table to support the cue stick. Let’s see how to form a rail bridge:
- Position Your Hand:
- Place your hand on the table, palm facing down, near the cue ball’s rail.
- Your thumb and fingers should be out of the way of the cue ball and the intended shot.
- Rest the Cue Stick:
- Rest the cue stick on the table rail, with the cue tip positioned to strike the cue ball.
- Position your wrist to stabilize the cue stick and prevent it from moving.
- Adjust Your Grip:
- Use your fingers and thumb to stabilize the cue stick against the rail.
- Ensure your grip is firm but not too tight to allow a smooth stroke.
Players usually use the rail bridge when the cue ball is near the rail, making a regular bridge impractical. The bridge provides stability and prevents fouls by allowing the cue stick to rest against the table’s edge.
This technique is ideal for making precise shots with controlled force. It is also beneficial when you need extra support to execute a shot accurately.
| Pros | Cons |
|
|
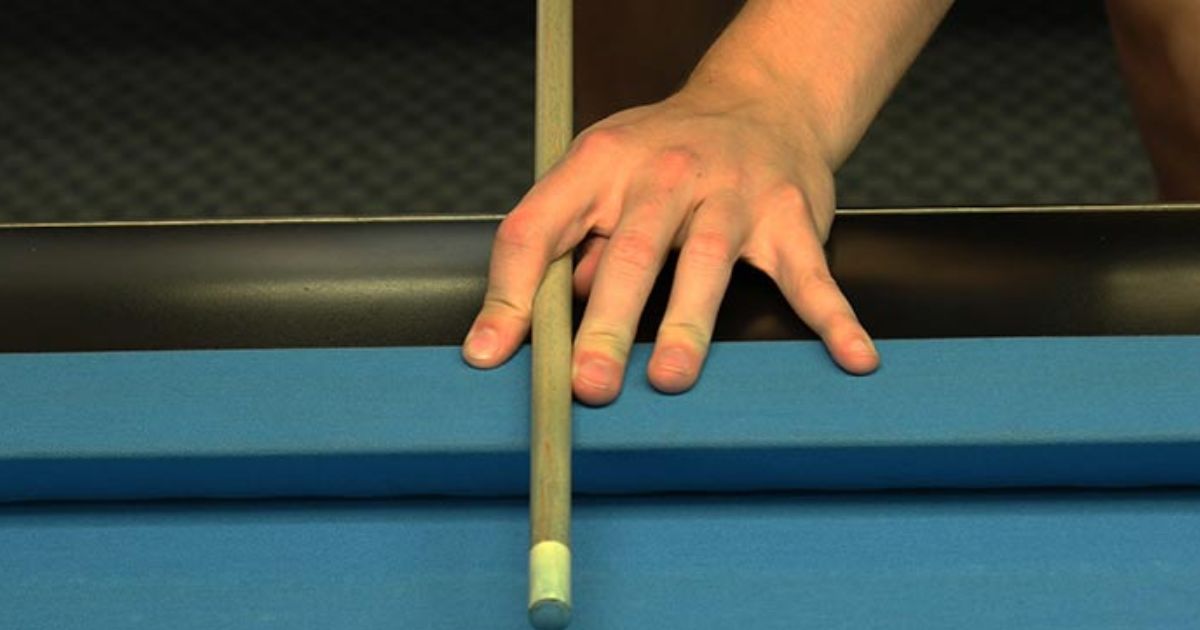
Position your hand and cue stick on the rail in rail bridge
Elevated Bridge
The elevated bridge is the technique for players to deal with striking the cue ball at an elevated angle. They make this shot by raising the bridge hand that holds the cue stick higher than usual. Here is how to form this technique.
- Form the Bridge Hand: Place your bridge hand on the table as a standard bridge, but keep your fingers close together.
- Raise Your Fingers: Lift your fingers off the table while keeping your palm and the heel of your hand on.
- Finger and Wrist Alignment:
- Index Finger: Bend your index finger slightly and press it against the side of the cue stick to help stabilize it.
- Middle Finger and Ring Finger: These fingers should be slightly bent and elevated off the table.
- Thumb: Position your thumb parallel to the cue stick, providing additional support.
- Wrist: Keep your wrist straight and steady to maintain the bridge’s stability.
- Cue Placement: Place the cue stick on the elevated bridge formed by your index finger and thumb, ensuring it rests securely.
This technique is beneficial when the cue ball needs to jump over another ball or make unique trick shots.
For example:
- Jump Shots: Make the cue ball jump over another ball obstructing your target’s path.
- Masse Shots: Create a spin to the cue ball to curve it around obstacles.
| Pros | Cons |
|
|
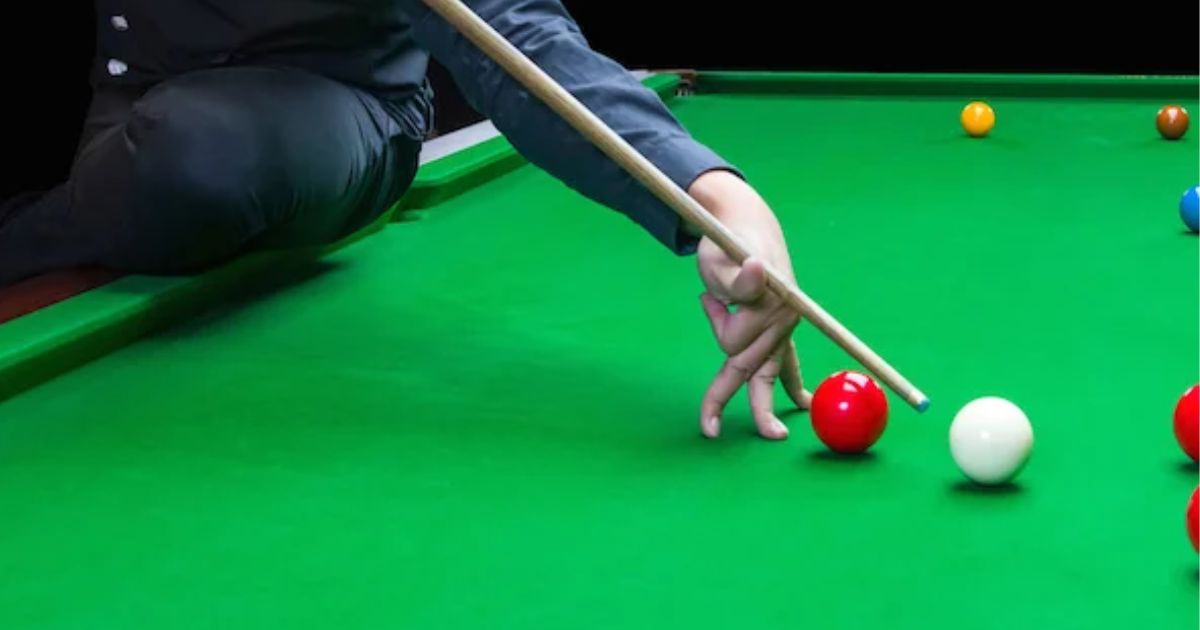
Lift your fingers off the table in elevated pool bridge
Finger Bridge
The finger bridge is a technique that uses the fingers to guide and stabilize the cue stick. Follow these guides:
- Place Your Hand: Place your bridge hand flat on the table where you want to form the bridge.
- Raise Your Index Finger: Lift and arch your index finger slightly to create a gap for the cue stick to rest.
- Position Your Thumb: Bring your thumb up to meet the side of the index finger, creating a V-shape.
- Stabilize with Other Fingers: To stabilize your middle, ring, and pinky fingers, keep them spread out and flat on the table.
(Your palm should remain on the table for additional support.)
A finger bridge is ideal for making high-precision and delicate control shots, for instance:
- Precision Shots: Ideal for shots that require high precision, such as those close to the object ball or the rail.
- Controlled Spins: Useful for shots where you must apply a precise amount of spin such as back spin or forward spin to the cue ball.
- Tight Spaces: Effective in tight spaces where a more elaborate bridge might not fit.
| Pros | Cons |
| Less stable compared to other types of bridges |
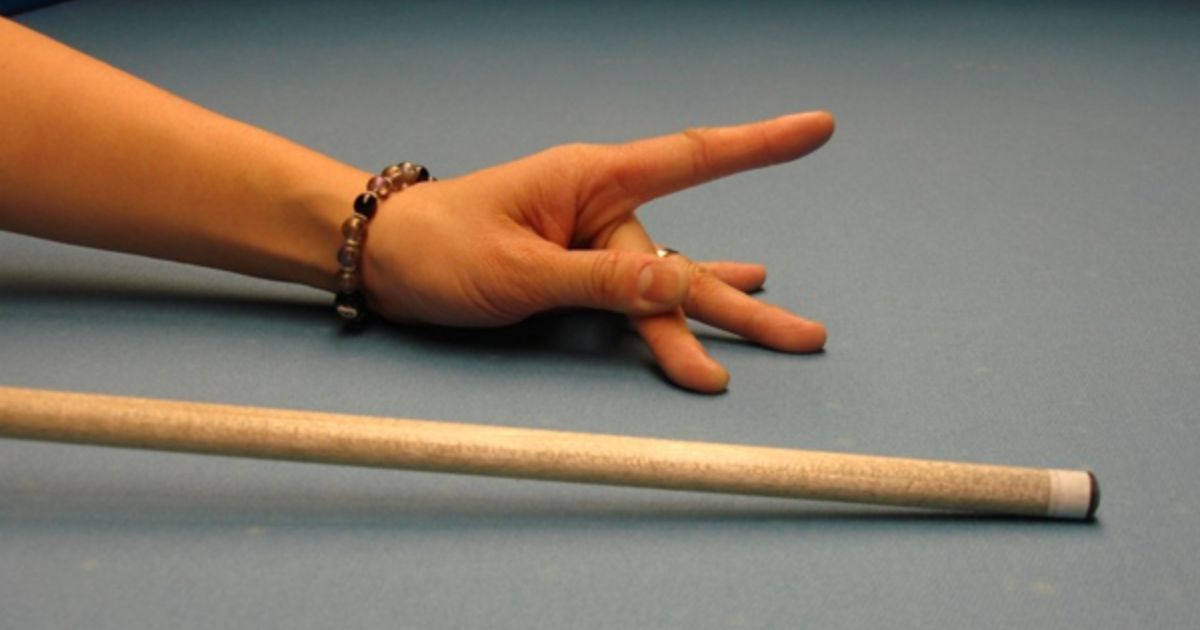
The way to position your fingers to make a finger pool bridge
Spider Bridge
Spider bridge is the pool technique that uses an additional tool with legs of different heights to support the pool cue. It helps players elevate cue sticks to various heights and angles for easier making shots.
- Position the Spider Bridge: Place the spider bridge on the table where you need to elevate the cue stick to ensure stability and correct positioning for your shot.
- Choose the Height: The spider bridge has legs for varying heights. Adjust the legs to match the required elevation of your shot to select the appropriate height.
- Align the Bridge: Position the spider bridge so the cue stick can rest in one of the grooves or notches at the top, aligned with your intended shot line.
- Place the Cue Stick: Place the cue stick in the chosen notch or groove on the spider bridge, ensuring it is securely held and can glide smoothly.
Players use a spider bridge when another ball blocks your direct shot to the cue ball, making it necessary to elevate your cue stick. It’s also helpful for shots that need a precise angle you can’t get with a regular bridge.
Additionally, a spider bridge is valuable when you need extra reach across the table and have to lift the cue stick higher.
| Pros | Cons |
|
|
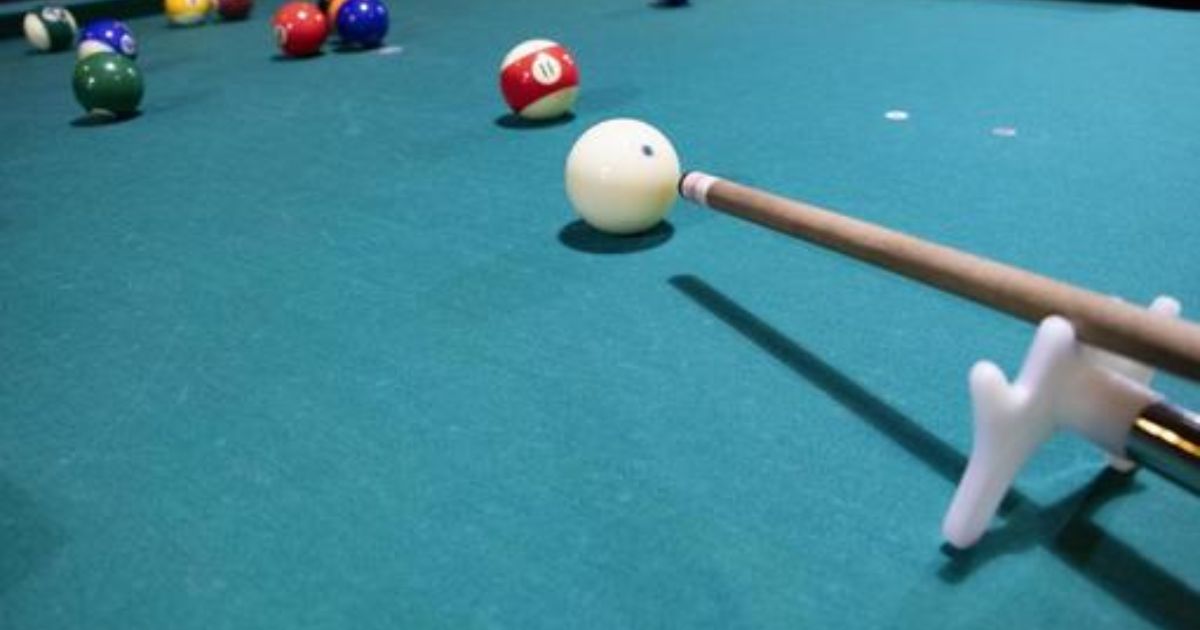
Use the tool as spider bridge to elevate cue stick for making shorts
Mechanical Bridge (Rest)
The mechanical bridge, often called the “rest,” is a pool tool that provides additional reach and stability for shots that are difficult to execute with a hand bridge. It consists of a long handle with a head and various notches or grooves to hold the cue stick in place.
- Position the Bridge: Place the mechanical bridge on the table where you need extra reach. Ensure that the head is stable and properly positioned.
- Select the Groove: The bridgehead has different notches or grooves. Choose the one that aligns best with your intended shot line.
- Place the Cue Stick: Rest the cue stick in the selected groove, ensuring it sits securely and can move smoothly.
- Stabilize the Bridge: Hold the handle of the mechanical bridge with one hand to keep it steady. Make sure it doesn’t wobble or move during your shot.
Players typically use the mechanical bridge for long shots when the cue ball is far from the object ball, and you need extra reach. It’s also helpful when a hand bridge is impractical, such as when the cue ball is near the table’s edge or blocked by other balls.
Pros | Cons |
|
|
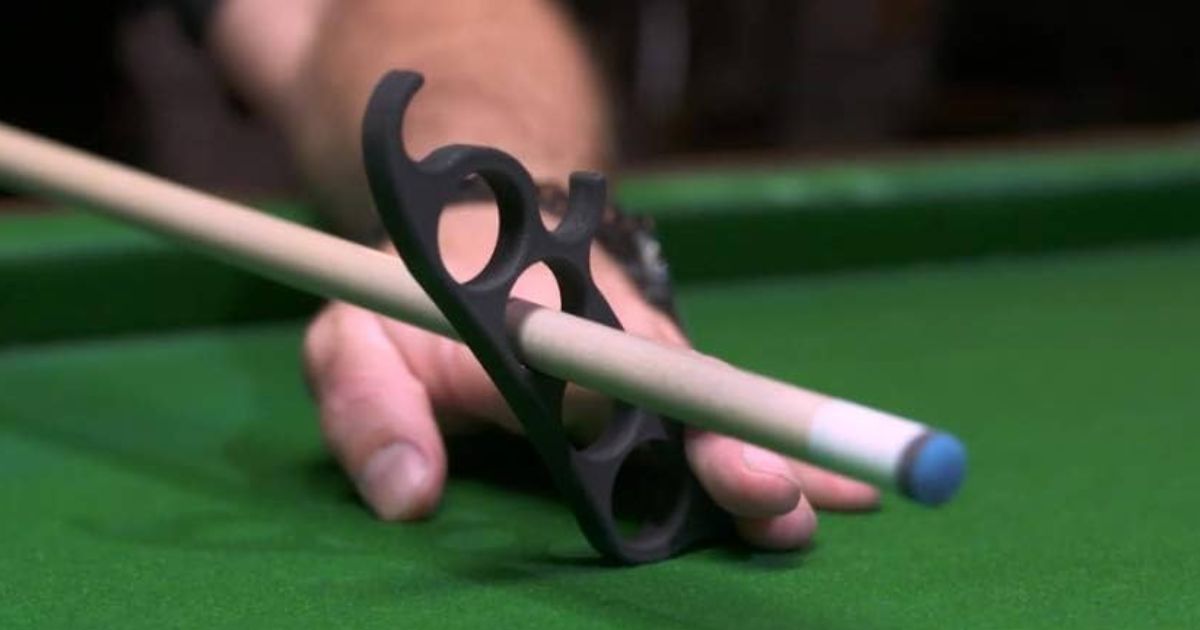
Place the mechanical bridge on the table for extra reach
Choosing the Right Hand Bridge
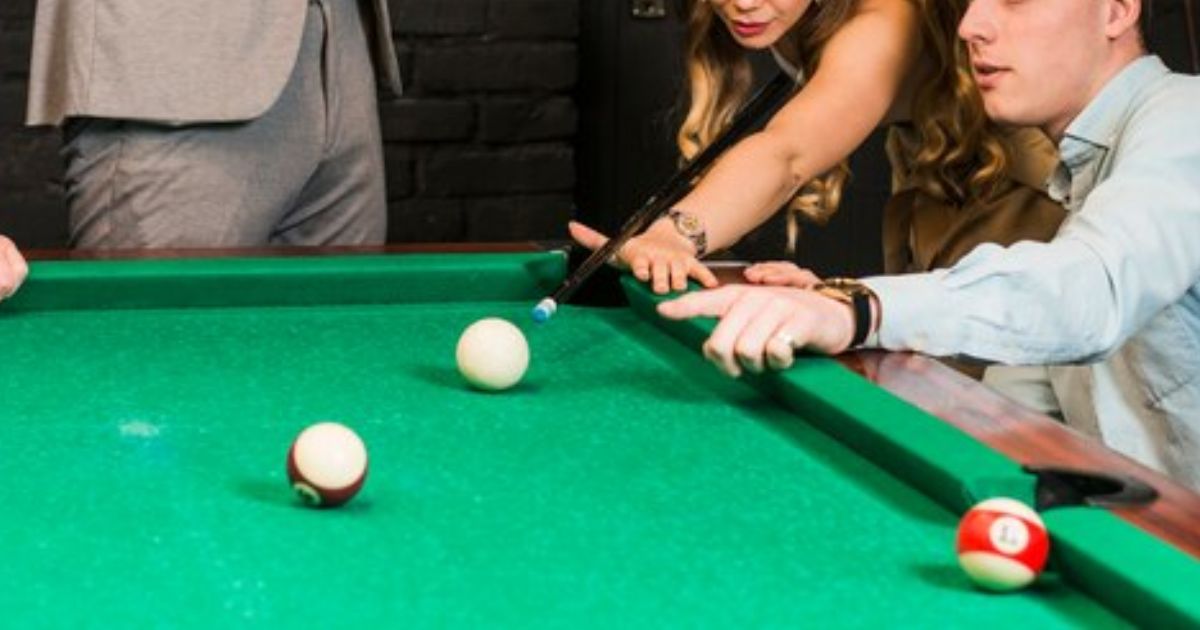
How to choose the right hand bridge to making shot in pool game
Skill Level
- Beginner Players
The open bridge is highly recommended for beginners. It’s simple to form and provides stability, making it easier to learn basic shots. This bridge offers a good balance of control and ease of use, ideal for those new to the game.
- Intermediate Players
Intermediate players should become comfortable with the closed bridge. This bridge offers more control and precision, essential for more complex shots.
It also allows for better cue ball control and spin, crucial as players develop their skills and deal with more challenging shots.
- Advanced Players
Advanced players can experiment with various bridge techniques, including the elevated and finger bridges, to handle specific shot requirements.
The elevated bridge, formed by lifting the hand off the table, is helpful for jump shots and avoiding obstructing balls.
The finger bridge, where the cue rests on the fingers, offers precise control for delicate shots.
Mastery of these advanced bridges allows seasoned players to adapt to any situation on the table and execute complex shots with precision.
Shot Requirements
- Power Shots
The closed bridge is the best choice for powerful shots. It provides stability and control, allowing you to apply maximum force to the shot.
- Precision Shots
When you need precision, use the open bridge. This bridge offers a clear view of the cue stick and cue ball, making it easier to aim accurately.
- Trick Shots
Use specialized bridges like the elevated and finger bridges for trick shots.
- The elevated bridge is suitable for jump shots.
- The finger bridge provides control for spin and curve shots.
Personal Comfort and Style
- Comfort
Comfort is key when choosing a hand bridge. It should feel natural and stable, allowing you to focus on your shots without discomfort. Uncomfortable bridges can affect your accuracy.
- Adaptability
Being adaptable to different hand bridges is essential. Practice using various styles, such as the open, closed, and elevated bridges. It will help you handle any shot comfortably and effectively, improving your game.
Frequently Asked Questions
How do I know if I’m using the right hand bridge?
To know if you’re using the right hand bridge, you should consider some factors below:
- Level: Your level will determine the right-hand bridge. Are you a beginner, intermediate, or seasoned player?
- Short-Making: Different hand bridges can make different shots. For example, power shorts need to use a closed bridge.
- Comfort: Using the right-hand bridge allows you to make accurate shorts with a natural feel easily.
Can I use multiple hand bridges in a single game?
Yes, you can use multiple hand bridges in a single game. As in the game, there are various positions the ball can be in. You must apply different hand bridges to create shots to reach the goal.
Which hand bridge is best for beginners?
The open bridge is ideal for beginners because it’s easy to form and provides stability, making it more straightforward to learn basic shots. It offers a good balance of control and ease of use, perfect for those new to the game.
